
Tutorial Simple Joining Square Technique – it’s very easy and fun 😀
I love to make blankets, especially those with motifs and shapes. The only thing that I hate is to join them >.< I know…it won’t be a blanket if I don’t join all the squares or other shapes.
I checked so many times, and I found lots of beautiful joining techniques, and I tried all of them already, but none is materialized lol! It means, I tried them, and I frogged them, because simply it’s taking too much time or the final looks giving me a raise eyebrow; it’s just simply too much for the whole design, meaning, a big distraction from the actual squares motif/design.
I decided to find a shortcut, to join the squares with a simplest joining method, single crochet (sc), chain (ch) and slip stitch (ss). This technique might look like a flat braid technique, but much more simple than flat braid technique.
I’ll show you now 😀
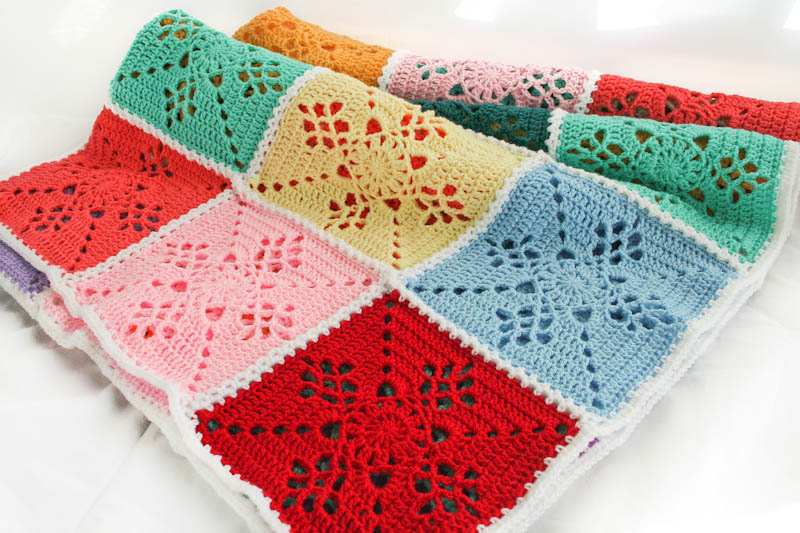
For the squares, I’m using Destany’s Victorian Lattice Square, a rich and elegant square in solid color for each square and lot of colors 😀

This square is very elegant by itself, and when I was making these beauties, I was asking myself, what kind of joining method that I should use. My first thought was Flat Braid joining, simple and beautiful, but I have no patience on hook off/on. I wanted something simple and continuous without hook off and go to another loop.
So, this is what I’m doing with my blanket – I know there must be others who thinks the same or using the same techniques. It’s basic technique with basic stitches and I’m doing this documentation for the purpose of spreading the Love (and to remind myself – short term memory, like cats :D)
Please bear in mind, I’m using Victorian Lattice square and if you’re trying to use this method on other squares, you need to adjust the counting.
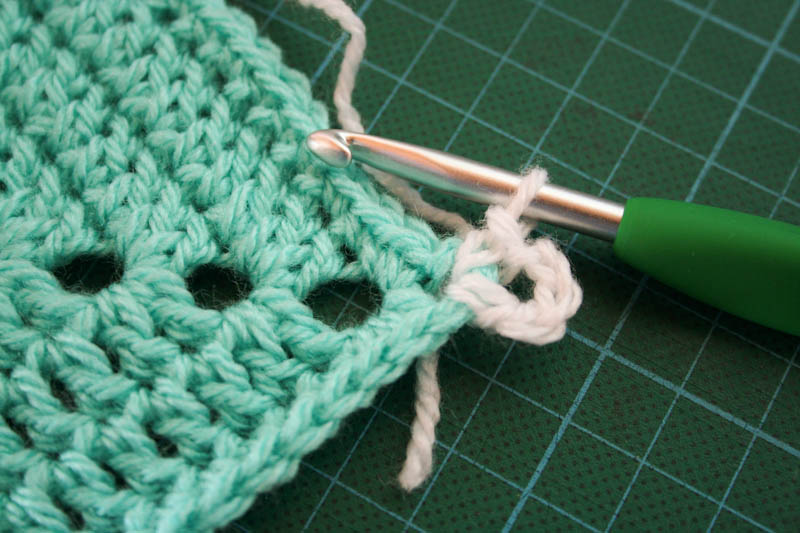
In the every corner, hook sc, ch4, sc
then, ch2, skip 1 stitch, sc in the next
continue it around, until you reach the beginning, ch2, slip stitch (ss) in the first sc, fasten off – this will be the base square joining.
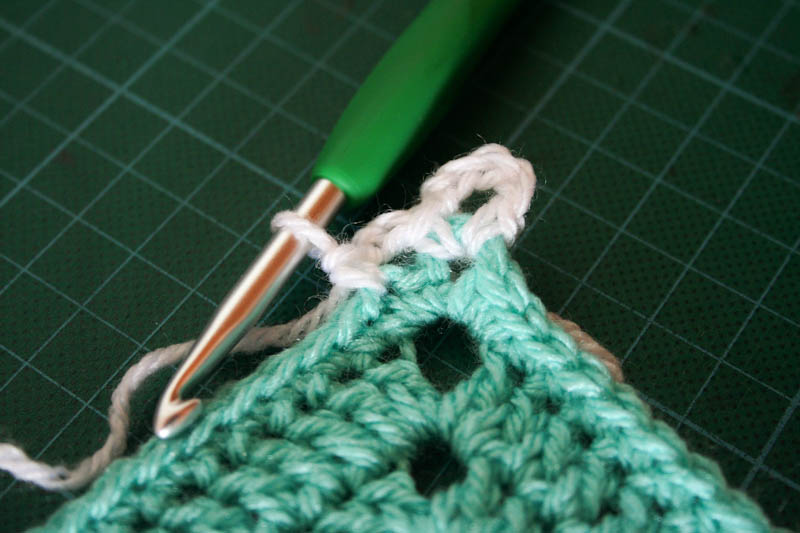
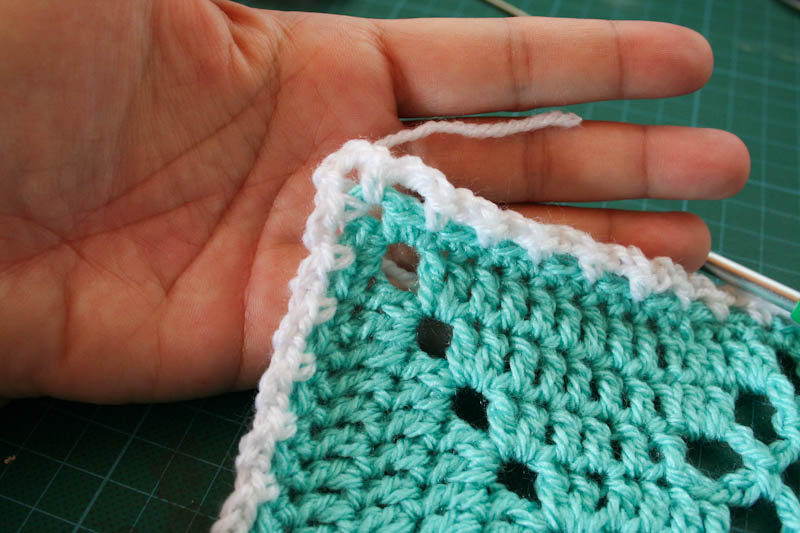
Take the second square, in the corner, sc, ch2, slip stitch on the first square’s corner, ch2, sc in the second corner
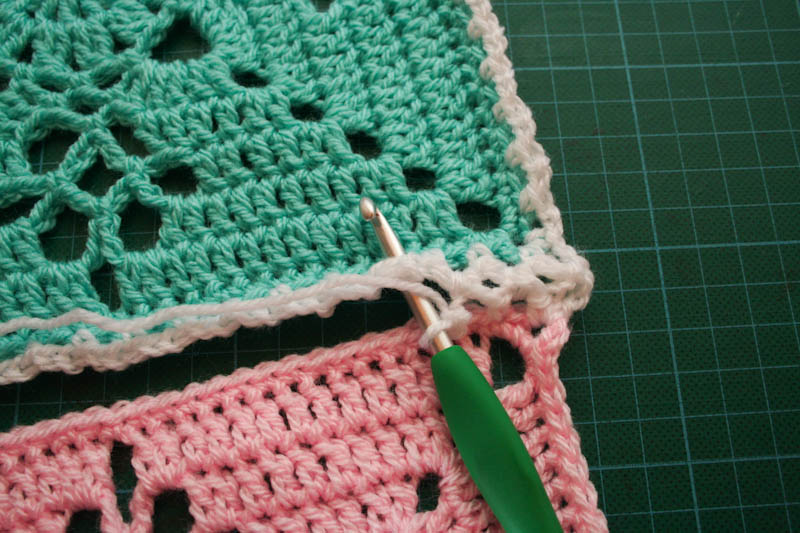
then, let’s the zig zag begins. After the last sc in the second square’s corner, ch1, ss in the first square ch-2 space (the one beside the corner), ch1, then, skip 1 stitch of the second square, sc in the next stitch of the second square.
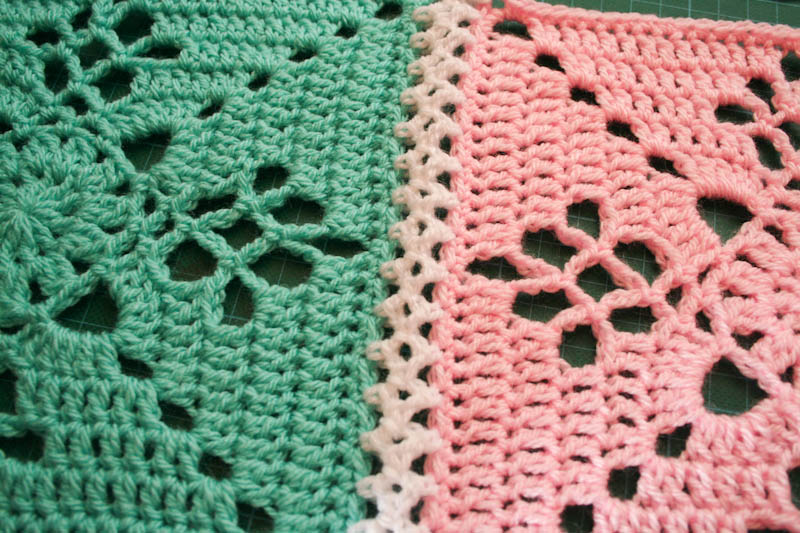
Sounds very complicated, but actually no. All position of sc along the sides of both squares are identical or at the same positions – as it’s facing each other.
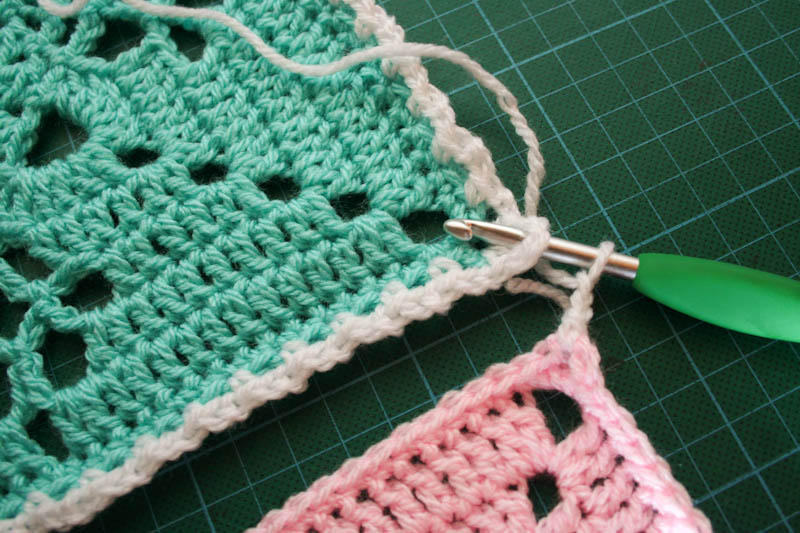
The third square, is a bit tricky. Start it with the third square’s corner, sc, ch2, ss under the 2 strands that the second square’s ss did. Here is the illustration:

When connecting second square to the first square with slip stitch, you will have 2 strands (the yellow yarn). The position of the hook with 2 strands above is where you need to attach the third square.
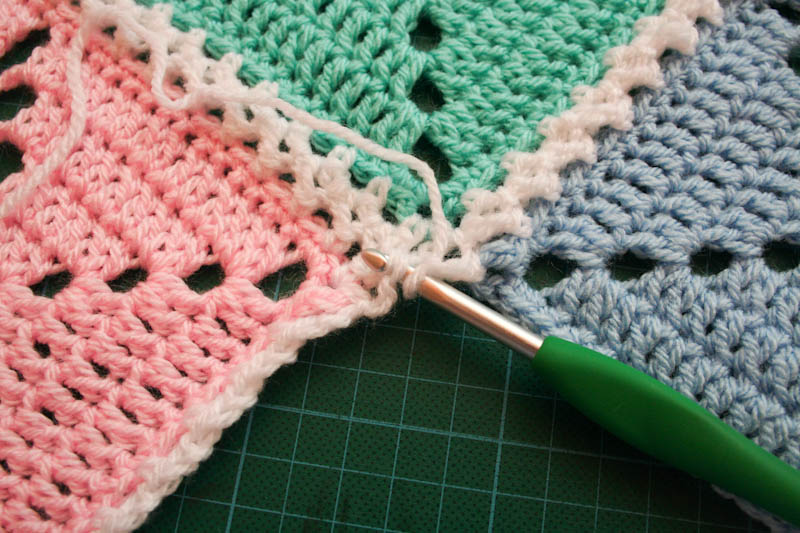
This will create a nice round shape in the middle, when the fourth square is attached (in the same 2 strands)
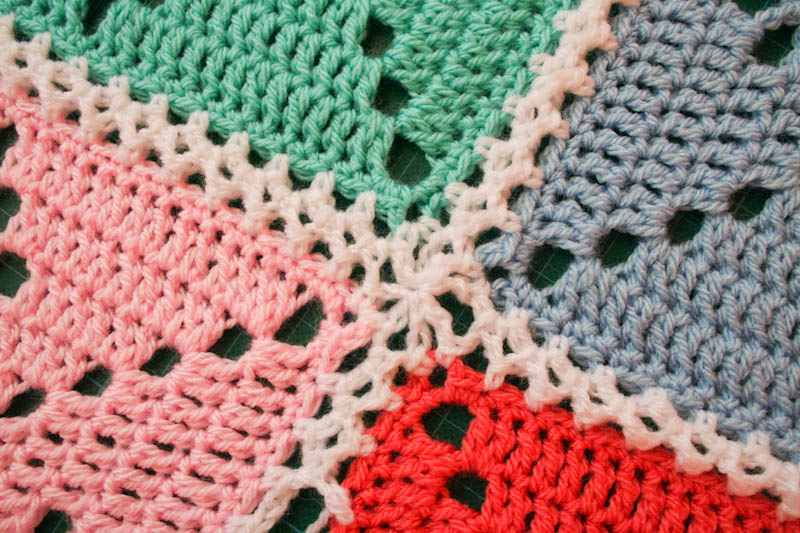
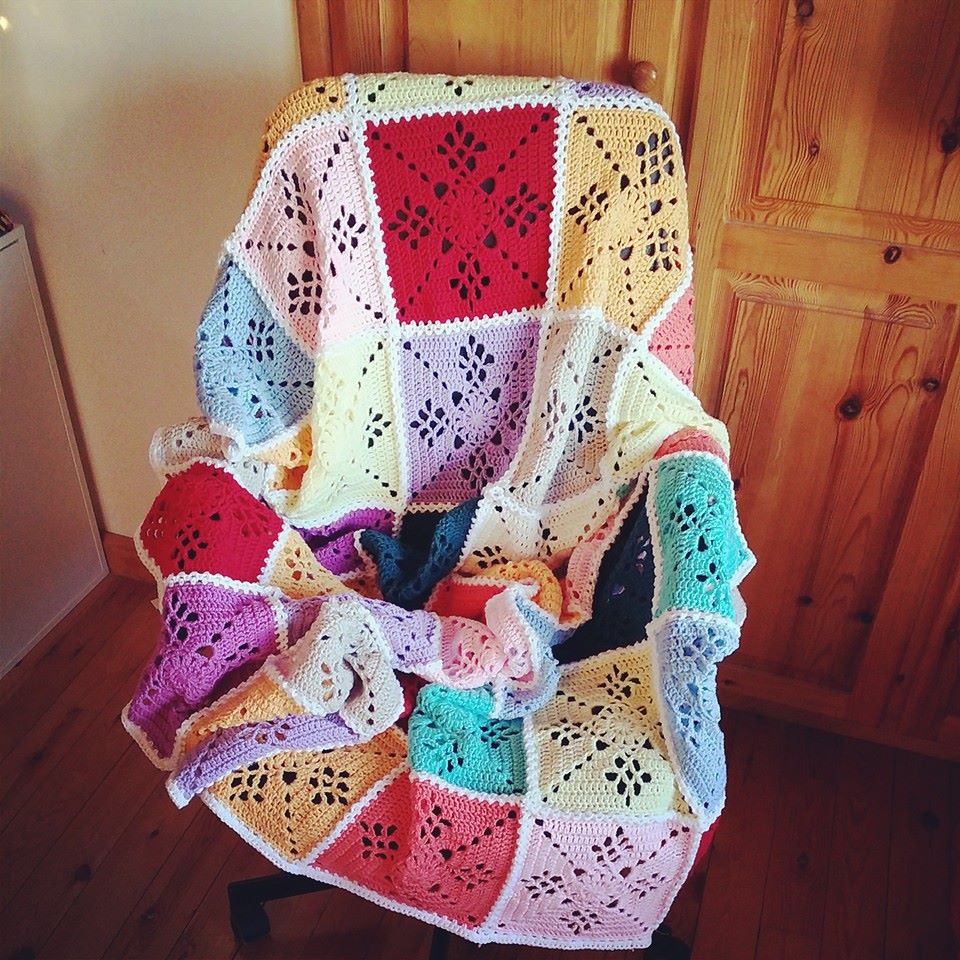
This is how it looks with 4 squares assembled
It took me 2 days to join 48 Victorian squares. I didn’t take any measurement yet, as I still need to convince myself to start whipping the tails >.<
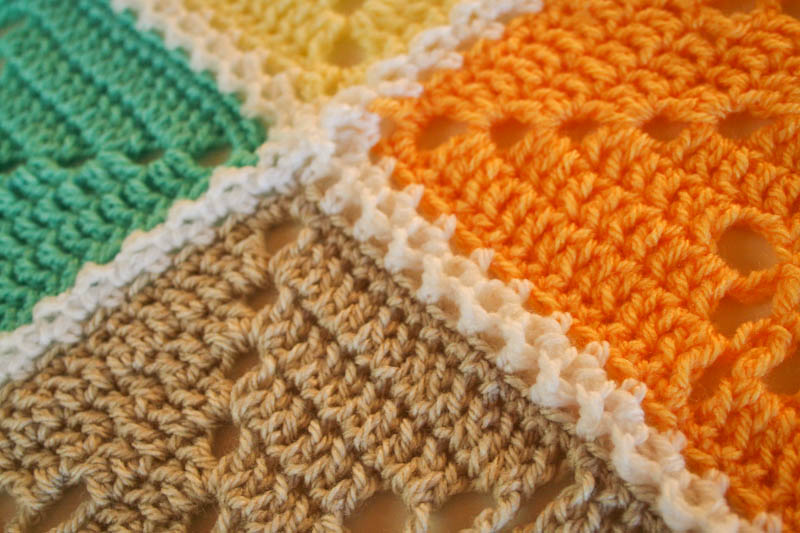
I love how it turned out, the joining lines are visible, zig zag, neat, and simple enough not to distract the attention to the squares, in fact, this joining method enhancing the beauty of the squares. I haven’t manage to take proper picture, but hey…here it is 🙂
I fall in love 🙂
Happy trying and forgive my English, sometimes I have difficulty of expressing pattern in written language…I’m a fan of diagram pattern 😀
enJOY! x
Got featured on Oombakwa Design

Got featured on Moogly and Petals To Picot
Oh my goodness this is perfect! I’ve been searching for the best join method and now I found your version! Yay for you! I cannot wait to start joining my square!
thank you 🙂
I’m kind of confused on how to join the second and first square, like after the ss and ch2 do you sc into the corner same corner as where you started in the second square or the next corner in the first? Also after that do you make sc,ch2 and ss and sc in each skipped sc? Sorry I’m much more of a video visual learner.
hi, the idea of joining squares is always zigzag so as to connect both squares.
Take the second square (new square to be joined), in the corner, sc, ch2, slip stitch on the first square’s corner (base square), ch2, sc in the second corner
So, the idea is to start with the new square, then we have to connect the new and the base square. Once in the new square, you add sc, ch2, then you will need to slip stitch to the base square, ch2, sc in the new square, this way it will secure the join.
hope this helps, and I’m sorry that i’m not so much of a video maker
I feel very stupid. I have used your join before, but I think I made a mistake when joining 3rd square. Do I start in the corner with a sc and then do 2 chains and then attach to “the yellow strands” with a ss, 2 chains again and a sc in corner?
Hi, joining the third square is a bit tricky actually. You will need to start with the 3rd square itself, sc, ch2, and slip stitch to the “yellow strand”, then ch 2 and sc in the same corner, then, ch2, skip 1 stitch, sc in the next.
So the rule in the corner remains the same (but instead of doing ch 4 by itself, you split into 2, ch 2, ss to the other order, ch2 and sc in the same corner) as you want to create an arch so that you can attach the fourth square to create a nice flower-like shape in the middle
Hope this helps 🙂
Thank you. I was actually right. Don’t know why I thought it was wrong. Thank you so much. I do appreciate your creativity
^^ you’re most welcome 🙂
Thank you, this is perfect for the blanket that I’m making as it a nice flat join. 🙂
^^ thank you
Thank you for this joining tutorial! I’m looking forward to trying it out. And I completely understand about weaving in the ends…. that’s the worst part! It can take me weeks just to get that dreaded bit done.
Thank you 🙂 have fun trying
I don’t understand the connection for the 3rd square at all. What’s the yellow yarn for? I don’t see it. I’m confused and feeling a little dumb as an intermediate crocheter. Could someone make a video for this? Help! 🙁
The yellow yarn is just to show how to do 3rd joining.
Beautiful and simple
Thank you
Thank you so much, hope you enjoy it 🙂
I love this joining. Thank you.
Thank you so much <3
This is brilliant – I love this method of joining. I normally don’t make squares because I don’t like joining but this is great!
Thank you 🙂
Thank your for this. I was looking for something like this couple of years ago. Going to use this next time. Hope I can pull it off.
Thank you! Please let me know if you need anything 🙂
Wonderful! Im going to try it. Thanks for sharing this!
Thank you, please let me know if you need any help. Enjoy!
I need help in understanding how to join the 3rd square. What stitch do I put the slip stitch in when I have two corners?
Still the same for corner: sc, ch 4, sc. 🙂
When joining the second square, what is the zigzag pattern?
Hi, I apologize for the late reply. Just got back from holiday.
Zigzag pattern means connecting from each square alternatively.
Thank you for this tutorial. It is very well written. I will be trying it on my next project.
Thank you! 🙂
i’m going to use this joining method. it looks fairly easy and that’s what i need as a beginner. thank you!!
Thank you 🙂 Hope you enjoy it, it’s very easy indeed 🙂
my squares are all done and they are beautiful! My question is, is the foundation square for joining to be used in the center or corner of the blanket? Thank you!
Thank you!! You can start either from center or corner 😀
This I really like! I don’t like wide borders like you say as i don’t want to detract from the patterned squares. I also don’t like a raised border so this looks ideal. I have just finished my third blanket so am having a short break from doing another but will definitely be trying to do this . I appreciate the photographs too as I am quite a new crocheter. 🙂 thank you.
^^ So glad to hear that you like it 😀 Happy trying! 😀
Thank you. I love both the square and the join instructions. Very pretty.
Thank you!! I’m glad you like it 😀
Will you be doing a video tutorial? I love this look but I’m new and I’m not understanding how to do it.
Hi Kelley! I dont have any plan with video, as I will be all cranky! The joining tutorial is very basic (only single crochet, slip stitch and chaining), and you dont have to use the same square, you can use any square you want, make sure to count the stitch before you start as different square may result different count of skipping stitch 🙂
I love your joining method, do you have the pattern for the square. The combination is beautiful. Thank you.
Thank you! When you click “Destany’s Victorian Lattice” in the post, it will take you directly to Destany’s free Ravelry pattern 🙂
Thanks, found it!
You’re welcome 😀 Happy crocheting x
This is such a beautiful method to join granny squares! I love your blanket very much. What a beauty! Thanks for sharing the pattern. Viola
Thank you so much!!! Im glad you like it 😀
Aurelia,
It’s absolutely delicate and beautiful… Thank you for sharing!
Thank you 😀
Love this method, your blanket is beautiful. Thank you so much for sharing.
Thank you!! Im glad you like it
Thank you Aurelia! I want to make this join and your pictures and instructions help a lot! <3
Thank you! Im glad that you found it useful
Hello, it looks beautiful. I also prefer the diagram pattern. Do you have it, please?
Thank you so much.
Thank you! Unfortunately i dont have the diagram pattern now as i dont know how to make one im sorry!!
Thank you, thank you, thank you. I have been looking for a simple, beautiful join technique to make a blanket for oh…….. 12 years. I have hundreds of squares that I have made to use up bits of yarn and finally have the technique. I`m soooooooo grateful. Thanks so much!
Thank you!!! I’m glad you like it
This join is very elegant and goes so well with the squares. Love it! I will save this and share it.
thank you 😀
Thanks I like the way you joined the squares. Love the squares too. The pattern is unusal.
Thank you 😀
Simply beautiful!! Thank you for the tutorial I have been looking for one to to do for my new shabby chic bedroom and this is it!!!! God bless you I seriously have been looking for 8 months more or less!!!! Thank you thank you Thank you!!!!!!
Ohh Im glad that you found it useful 🙂 Happy crocheting and connecting, dear 🙂
I like the looks of this joining. I usually do a JAYG but with the square I’m working on now it isn’t working at all. I think this joining is exactly what I’m looking for. Thanks so much for sharing and the picture tutorial is very helpful.
Thank you! Hopefully I don’t confused you with my way of explaining >.< I'm bad in writing pattern ^^
I love this method! Your blanket is simply gorgeous!
Thank you 😀
Ladies, you made my day 😀 xxx
I’m trying this technique on my current project – it’s just lovely. Pinned
Thank you! 🙂
A very beautiful blanket, your joining method is lovely and delicate and suits the squares!
Thank you 🙂
Joining the squares like this is beautiful! Thank you for sharing the pattern.
Thank you 🙂